The Apparatus Architect: Placing a New Apparatus into Service
Delivery times for new apparatus are at an all-time high. Some manufacturers are quoting 25–36 months for the production of a new vehicle. Apparatus committees must plan for the various benchmarks that must be achieved after the final inspection to place the new rig into front-line service.
Ideally, departments address the roadmap for vehicle acceptance and payment with their specifications and contract language. These areas are critical for the department as well as the manufacturer to alleviate delays in putting the new unit into service. (For example, many contracts include statements that require full payment for the apparatus before it can be placed into service.)
Further streamlining the process is ensuring that your specification boilerplate details your expectations for post-final inspection activities. These include a follow-up inspection at the dealership, a review of technical manuals and as-built electrical drawings, and setting up factory training.
In a circumstance in which a department purchases a make and model of apparatus for the first time, a meeting with the dealership’s warranty and service team should be set. This allows department personnel to familiarize themselves with that team’s capabilities and system to provide warranty and technical support. Depending on the dealership’s warranty certifications, at some point, a department will work with businesses other than the dealership for service work, including regarding the engine, transmission and/or emission components.
In-service weights
Confirmation of in-service weights often is overlooked, yet it should be accomplished— on certified scales—prior to making final payment on the apparatus. This involves having all hose, tools and equipment placed, a full complement of personnel on board, and water and foam tanks filled. These weights should be verified against the chassis axle, tire and suspension ratings to ensure the safe operation of the vehicle.In-service training
At some point during the final inspection process, coordinate with the dealership regarding the logistics for in-service training on the new apparatus. Vehicle familiarization for an engine or rescue vehicle usually is provided by the local dealership and, generally, can be scheduled for both day and evening sessions.
New aerial apparatus training is provided by the manufacturer. It should span at least 2–3 days, including time that’s dedicated for the department’s maintenance staff to troubleshoot issues as they arise.
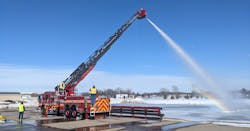
After the initial familiarization with the procedure to set up and stabilize the rig, consideration should be given to training that’s conducted at various target hazards in the response district. If the aerial device is equipped with a pump and waterway, the training should include operational testing of this equipment to determine the pump pressures that are required to achieve the desired target flow rates and to confirm the flowmeter calibration.
The number of members who participate in this initial training is critical. Too many personnel in an initial training might diminish the detail that can be disseminated by the trainer.Consider video recording each session. The recording can be utilized for other department training classes.
Every department should have an apparatus operators training program that encompasses all aspects of the vehicle, including practical, road and operational testing.
Incorporate the manufacturer’s component and training manuals into the apparatus training. Include task books that take the prospective operator through all of the critical components of the new vehicle. Many departments require a new trainee to successfully accomplish each specific task in the workbook as well as several emergency responses to be turned over as an operational driver on the apparatus.Tool mounting
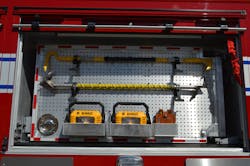
Depending on local resources and a department’s expectations, a new apparatus should be outfitted with tools and equipment, including radios, chargers, meters and other cab-mounted equipment. (Tool mounting and equipment placement should be reviewed at the preconstruction conference to determine where shelves, slide trays and tool boards would be located. This step is critical to accurately determine the chassis axle and suspension components by the manufacturer’s engineering group.)
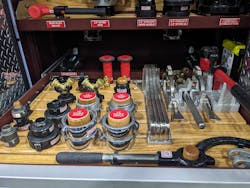
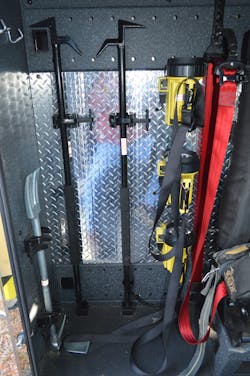
A well-designed and well-constructed apparatus should have all critical equipment properly mounted and secured inside of the cab and body to align with the department’s operational guidelines. Equipment that’s carried inside of the cab can vary widely depending on a number of factors. Forcible entry equipment, hand tools and extinguishers should be secured in 9G-rated brackets and hardware. That said, there is some debate as to what could or should be mounted inside of the cab. The bottom line is that this is a local decision, and it’s more important that the equipment locations meet operational demands, to align with the service levels that will be delivered by the department.
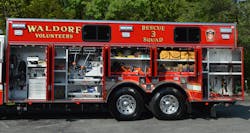
When determining where each piece of equipment should be located within the body compartments, several methods can be utilized to ensure that the project will be a success. If your department operates a fleet of rigs, there likely is a standard layout for what’s carried inside of each compartment. If the compartment dimensions on the new rig are similar to those of existing apparatus, the process should be fairly easy.However, apparatus that have a unique body design (similar to that of a rescue-engine), with a varied tool complement, require other methods. One is to lay out the interior compartment dimensions on a large piece of cardboard and position the tools and appliances to confirm the needed space.
Some departments construct mock-ups of each compartment to capture depth.
If time permits before the new rig is sent to the vendor for tool mounting, all of the tools and equipment should be positioned inside of the compartments to verify that everything fits into its assigned place.
The cost for tool mounting should be included with the final cost of the apparatus, with a fixed sum that’s estimated based on type of apparatus and extent of equipment inventory, the latter of which can include custom-made aluminum brackets and hardware. Most upfitting vendors quote a job on the basis of time and material.Dot the “i’s,” cross the “t’s”
Once the new rig is accepted, verify that the vehicle was placed on the department’s fleet insurance and that it meets any local licensing requirements. If you do this and follow the aforementioned guidance, a new rig should be in service very soon after it comes off of the production floor.
About the Author

Tom Shand
TOM SHAND, who is a Firehouse contributing editor, is a 36-year veteran of the fire service. He works with Michael Wilbur at Emergency Vehicle Response, consulting on a variety of fire apparatus and fire department master-planning issues. Shand is a member of the Firehouse Hall of Fame.
Michael Wilbur
MICHAEL WILBUR, who is a Firehouse contributing editor, retired as a lieutenant in FDNY, where he was last assigned to Ladder Company 27 in the Bronx. He has served on FDNY's Apparatus Purchasing Committee and consults on a variety of apparatus-related issues around the country. Wilbur is a member of the Firehouse Hall of Fame. For further information, access his website at www.emergencyvehicleresponse.com.
