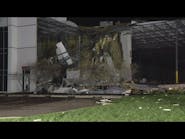
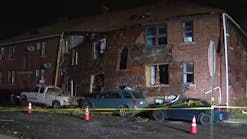
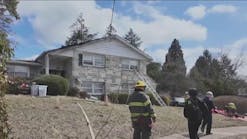
Structural collapse or structural compromise of a building is a low-frequency, high-risk event that warrants specialized equipment and training. Whether rescuers are facing a motor vehicle into a house or a major structural collapse of a commercial building, shoring may need to be put in place to protect the patients and rescuers on scene.
Once a collapse hazard is identified, the incident commander (IC) has a few options for mitigating the hazard: removing the hazard, avoiding it, monitoring it or shoring it. Shoring is the best option when the hazard is in the general area of the rescue/extrication operations and will involve placing some type of temporary structure that will collect the load, transmit the load, then distribute the load back to the ground.
Once it is deemed that shoring will be necessary, crews must determine the type of shoring to use. The size of the building and severity of collapse will drive this decision. For example, is it a major bearing wall that is compromised or is it a non-loadbearing wall that is slightly damaged? The type of shoring needs to be determined during the incident size-up. However, it is preferable to have a structural engineer assess the need and type of shoring as well.
Rescuers from a technical rescue team should take a six-sided approach when measuring and identifying the best location for the shore. The location of the shore should be based on what will provide the best protection for the greatest number of people in the shortest amount of time.
Shoring should take a systematic approach in succession as the rescuers progress. If needed, rescuers should start on the outside and work the shoring inward. For example, if trying to gain entry to potential survivors in the middle of the structure, the rescuers may put rakers up against an exterior wall to keep it stabilized as well as a door shore to keep a doorway safe for entry and egress. Rescuers can then install two, three or more vertical post shores to keep an area generally safe.
Raker basics
One of the first shores that rescuers will use is rakers, which are used to secure the outside wall of the building that is damaged. As such, first responders should have a solid understanding of how to assemble exterior rakers, whether they be mechanical struts or wood.
One of the first questions that will be addressed is at what height the rakers should be installed against the wall. This is called the insertion point, and it is based on where the two floors meet. In general terms, this is where the ceiling of one level meets the floor from the level above. In wood construction, this would be where the rim joists (or band joists) are located. This location is where the raker ideally comes in contact with the wall. However, the insertion point could be anywhere from that determined location to two feet below it.
The two most common types of rakers used to secure a compromised wall are 45 degrees and 60 degrees. Again, which type of raker angle to use is dependent on how much room there is to get the raker in place and secure it. The 45-degree raker is the most commonly used raker and most preferred. The raker shore is a simple triangle that has a wall plate that goes along the wall and a sole plate that goes along the ground, and the actual raker that goes between the wall plate and the sole plate that supports the wall. This 4 x 4 raker is the hypotenuse of a right triangle.
There are three different types of rakers that can be used for stabilization, with each having its appropriate use in an operation:
1. Flying raker
2. Solid sole raker
3. Split sole raker
A flying raker can be pre-built and is a temporary class-one shore. The expected strength of this shore is approximately 1,000 pounds.
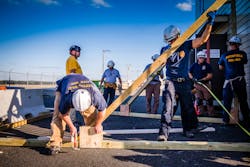
The solid sole raker is a full triangular shore. It has a full wall plate and sole plate that extends up the wall and along the ground for stronger stabilization via the actual raker (4 x 4). It is a common raker shore used in training; however, there must be no debris along the building for proper sole plate placement. The expected strength of the shore is approximately 4,000 pounds (Fig.1).The split sole raker is also a full triangular shore and has a full wall plate going up the wall, however, the sole plate is made by two 2 x 6 pieces of lumber. The advantage with this raker is it can go over debris and any other obstacles, such as machinery or HVAC equipment, that are adjacent to the building. The expected strength of the split sole raker is approximately 4,000 pounds.
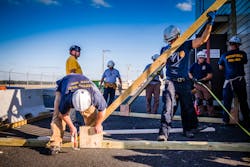
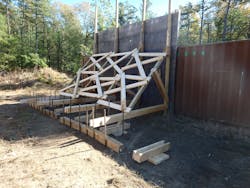
Which type of raker to use is dependent on how much room there is and debris that is in the way to get the raker in place. Rakers should be built-in pairs and subsequently laced and braced together to make a class III shore (Fig. 2).Cutting raker angles
Whenever rescuers get assigned to build a raker shore, one area of confusion, and possibly delay, is how to cut the raker angles. There are several different ways to mark out and cut the raker angles using speed squares, framing squares, a piece of wood, and also a template. The raker ends are the angles cut into the 4 x 4 raker (hypotenuse), with return cuts, so they create a joint in the wall plate, sole plate or trough box for greater efficiency.
To find the raker length of a 4 x 4, multiply the insertion point in feet by 17, which is a constant number, for a 45-degree raker. That will give the length of the raker to be cut in inches. If building a 60-degree raker, the insertion point would be multiplied by 14, a constant number. When laying out and marking a 4 x 4 raker, it should be laid out and marked by the same person, if possible. To make sure the angles are not going both in the same direction, which is a common mistake, ensure you are looking at what appears to be a bowl when done marking the 4 x 4.
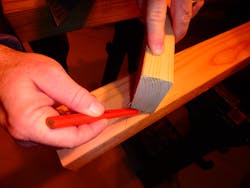
Speed square: A speed square is a versatile tool that is used quite often to mark the angles of the 4 x 4 raker ends. The speed square has two 45-degree angles and a 90-degree angle as well as a lip (spine) for placing the square on the material. The speed square has a natural 45-degree angle that can be used when building a 45-degree raker (Fig. 3).
When a different angle is needed, such as a 30-degree or 60-degree angle, place the speed square onto the material with the lip against the lumber and turn the speed square, via the pivot point, so that the angle desired is showing on the hypotenuse side of the speed square. Then draw a line from the pivot point down (Fig. 4). Remember that if building a 60-degree raker, one end of the wood will be 60 degrees and the opposite end will have to be 30 degrees, as both angles always must equal 90 degrees.
Return cuts will have to be marked out also so that the raker has full contact with the 2 x 4 cleat nailed into the wall plate, sole plate or trough box. Return cuts are measured 1½ inches in from the inside of the raker angle drawn. The location of the return cut is where 1½ inches reaches from the raker angle drawn to the edge of the lumber. This can be done with a speed square, tape measure or a scrap piece of wood (Fig. 5).Framing square: A framing square (or steel square) has multiple purposes, such as laying out rafters or stair stringers. If the framing square is being used to mark the raker angles on a piece of 4 x 4 lumber, then the numbers on the framing square need to be used to correspond to the angle. If marking out a 45-degree raker, the 12 inches on the tongue and blade should be held to the lumber. Then mark the side where the angle is desired on the lumber (Fig 6). If a 60-degree angle is needed, hold 12 inches on either the blade or tongue of the framing square and hold 7 inches on the other side of the square. When placed on the wood, this will give the rescuer a 60-degree angle on one side and 30 degrees on the other. Brass stair gauges can also be used on the framing square to keep it in place on the 4 x 4 if desired (Fig 7). Return cuts will have to be marked out also so that the raker has full contact with the 2 x 4 cleat nailed into the wall plate.
Piece of wood: If neither a speed or framing square is readily available, a scrap piece of 2 x 4 material can be used. To lay out the raker for a 45-degree angle, the rescuer can place a 2 x 4 at one end of the 4 x 4 lumber to be cut and mark both sides of the 2 x 4, which should be 3½ inches apart. Then draw a diagonal line from corner to corner of the marks in the direction the raker should be cut (Fig. 8). At the other end of the raker, at the desired length, repeat the process, but the diagonal line should be in the opposite direction (Fig. 9).
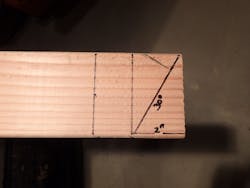
To mark out a 60-degree raker, the same technique can be used but requires additional marking of the lumber. On the 30-degree side of the raker, measure in 2 inches, and on the 60-degree side of the raker, measure in 6 inches. To accomplish this with a piece of 2 x 4 scrap wood, while on the 30-degree side, lay out one end of the raker similar to when making a 45-degree raker and mark both sides of the 2 x 4 for a span of 3½ inches. Then take the 2 x 4 and turn it on its end (1½ inches) and place it on the line opposite where the angle cut needs to be made and mark the edge of the 2 x 4. The remaining space between the two marked lines will be 2 inches, so you just need to draw a diagonal from corner to corner in the desired direction of the raker angle (Fig 10).On the opposite end, to make the 60-degree angle, keep the 2 x 4 on edge, and starting at the desired length of the raker, trace both sides of the 2 x 4 four times toward the 30-degree end of the lumber. This will give a distance between the first and last line of 6 inches and then draw a diagonal in the desired direction of the raker angle (Fig 11). Return cuts will have to be marked out also. This can seem complicated and confusing, but with practice, it is achievable and will work in the worst-case scenario that no squares are available to trace the desired angles.
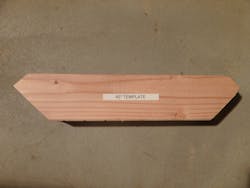
Template: A template can also be used on any scene when a raker shore is necessary. There have been templates made of wood, steel and aluminum for both 45-degree and 60-degree rakers. To make the template for a 45-degree raker, cut the 45 degrees on both ends of the material that is used and also make the return cuts. The length of the template from point to point should be 17 inches (Fig 12). For a 60-degree raker template, cut one end at 60 degrees and the opposite end at 30 degrees with the return cuts. The length of this template should be 14 inches.Each individual raker should be assembled away from the hazard zone and walked into the structure to be secured. Once the rakers (a minimum of two) are built, they should be laced together, and diagonal bracing should be installed to prevent racking of the shore. This will make it a class III shore. The shore should be attached to the wall and ground (where applicable) by various techniques to prevent the shore from moving if the compromised wall/building should shift.
In sum
There are many different techniques to cut the end of a piece of lumber to make a raker shore. We’ve covered some of the most commonly used but, without a doubt, there are other ways available to make the angled cuts. A rescuer does not need to memorize all the techniques described here to be used at a call. They need to pick one or two that they will easily remember and practice those techniques on a regular basis. That way, when the call comes in for a compromised wall, they will be confident in cutting the most intricate part of any shore they may face—the raker. Regardless of the technique used to cut the raker shore, the ultimate goal will be to assemble a raker shore that will provide temporary stability to a wall or structure and provide safety to the victims and rescuers who are working at the scene.
Mark McCabe
Mark McCabe is a 30-year member of the fire service with experience in fire suppression, hazardous materials, fire prevention and fire instruction. Since 1993, he has been a fire instructor who teaches in all fire service subjects. McCabe specializes in the instruction of technical rescue and currently is the coordinator of Technical Rescue for the Massachusetts Firefighting Academy (MFA). As a current team leader of the Southeastern Massachusetts Technical Rescue Team, he responds to technical rescue incidents within the commonwealth of Massachusetts. For 24 years, McCabe was a rescue specialist and squad officer with FEMA’s Massachusetts Urban Search and Rescue team, having been deployed for incidents from natural disasters to the World Trade Center on 9/11. He is a certified Rescue Technician, Hazardous Materials Technician and EMT, and he holds numerous professional career certifications. McCabe earned his bachelor’s degree in fire science in 2017 and his master’s degree in public administration in 2018, both from Anna Maria College, and completed the Chief Fire Officer Training Program at the University of Massachusetts Edward J. Collins Jr. Center for Public Management in 2019 at the MFA.
