Complicating our approach to extrication is the simple fact that staffing isn’t what it used to be. And in most places, it isn’t going to be getting better anytime soon. Does this give us an excuse for when things don’t go well? No. The public expects us to come to their aid and remove them from harm. Period. They don’t care that there are only three people on the rescue. The golden hour doesn’t magically become the golden hour and a half just because you are running short.
With all this in mind, what can you do to maximize your efforts with short crews and the modern-day vehicle? Here we’ll address several common extrication situations and how to use a more street-smart approach to handle the extrication in the safest and most efficient way possible.
Stabilization
Most vehicles made today are built with unibody construction, meaning the body and the frame are all one continuous piece. This makes stabilization much easier, as you don’t have to worry as much about placing stabilization directly on a frame rail for it to be effective.
The easiest form of cribbing for a vehicle resting on its wheels is the step chock. The step chock can be placed as intended to catch the rail, or it can be inverted to become a wedge that can be inserted wherever it creates the best benefit.
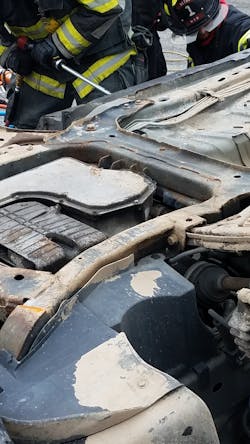
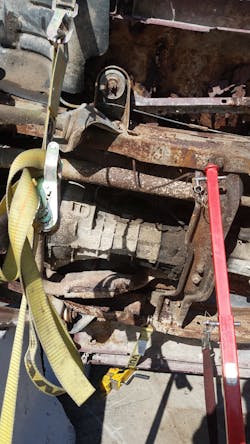
If the vehicle is resting on its side, using a strut system is the most appropriate option. A strut system can be placed by a single firefighter in a short amount of time. The struts should be placed on the underside of the vehicle, using existing openings in the frame system. Once placed and secured, the vehicle can be pulled back on the strut system with a winch, ensuring that it will not finish the roll onto the roof. By doing this, no further stabilization is required on the roof side of the vehicle, leaving it open to extrication maneuvers.
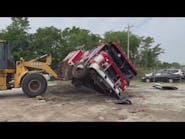
Vehicles found overturned can be secured with an overturned step chock acting as a wedge placed under the roof along the C-post if space allows. Most overturned vehicles will land “nose down,” as the engine compartment is the area of greatest weight. This causes the trunk area to be raised considerably off the ground.
A quick and easy stabilization method is to place a high-lift jack at the rear of the vehicle. The easiest, fastest and most secure place for the jack is to catch the C-post where it attaches to the rear window. This provides access to the “trunk deck” area inside of the passenger compartment as well as the post itself.
Gaining access
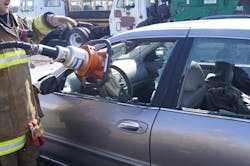
Considering the staffing situation on most scenes, companies should lead off with the tool of greatest benefit. In spreading situations, that is the biggest spreader carried on the unit. Yes, it is heavier and bigger than a combi tool, but it will give you much more bang for your buck.
One of the easiest and most effective spreading operations is the vertical displacement. By placing the arms of the spreaders in the back one-third of the window with the butt of the tool raised and pushing against the roof and the door panel, you are utilizing the design of the vehicle to open the door. The locking mechanism of the door latch rolls off of the Nader bolt much more easily then it is pulled off. By raising the butt end of the tool, the bottom arm of the spreader is pushing the door outward and down, causing the mechanism to roll. This technique commonly opens the door in one maneuver.
If the vertical displacement doesn’t totally force the door, it will undoubtedly give clear access to the hinge or the latch. Both are cut easily and quickly with an O-Cutter. When cutting the latch, place the blade on the sheet metal behind the bolt. Don’t cut the bolt itself. When cutting the hinges, make sure to have the blades on the same side of the hinge bolt. Don’t try to cut across the hinge bolt; it will damage your blades. When forcing a rear door after removing the front door, the hinges are usually accessible. Cut them first. After cutting the hinges, a vertical displacement in the rear window should finish off the door. Don’t be afraid to cut hinges and latches. They cut just as easily as posts and the roof.
Specialized tools
The air chisel is a less commonly used tool that also gives great benefit. An air chisel operates off of an SCBA bottle or truck air, and can be utilized to cut many different materials. It can cut sheet metal to flap a roof, and can cut posts and hinges as well as latches. It can also cut bus seat support brackets for heavy vehicle extrication. The air chisel has very few moving parts to troubleshoot and will not injure a patient should the blade come in contact with them inadvertently during the operation.
Final thoughts
Vehicle extrication has been and always will be a puzzle. The goal is to remove the vehicle away from the patient just enough for them to come free. Each extrication is different. What works in one may not work in another.
The modern-day vehicle is designed and built with occupant safety in mind. It has crumple zones that are designed to absorb force and disintegrate. The vehicles are made with high-strength/low-alloy metals that are lighter and stronger. While these components are great at their intended purpose, they make our job harder. We need to adjust our thinking and operational plans to work around them—in some cases with them—to complete the mission of extrication.
The modern-day extrication must become focused on utilizing the quickest, most advantageous maneuvers possible. Think outside of the box. Have more than one tool connected and ready to go. Utilize your personnel to the greatest benefit of the operation.
Tim O'Connor
Tim O’Connor is a captain in a combination company in Delaware. He has been in the fire service for 14 years and has held various positions during that time. O’Connor is an instructor at the State Fire School and holds an associate’s degree in fire science.
